Driving Guide
Driving Hazard Perception: How to Spot Hazards Earlier
Learn how driving hazard perception works, how to spot developing hazards earlier, improve observation on the road and prepare for the DVSA hazard perception test.
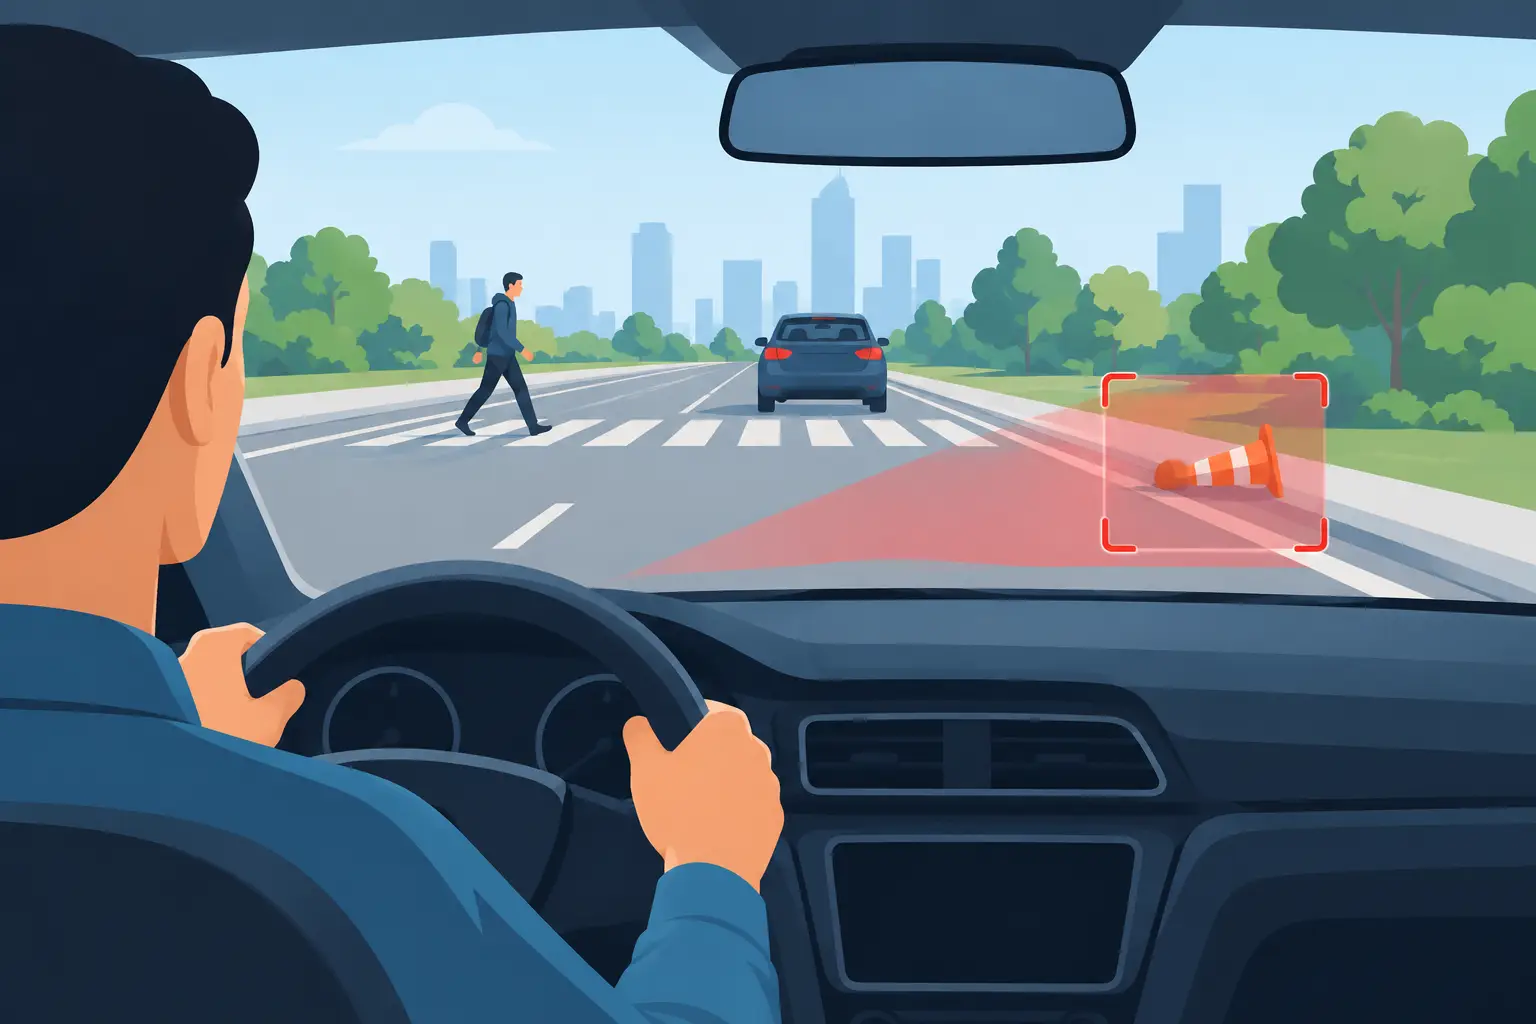
A child standing near a parked car. A van blocking your view of a side road. Brake lights appearing several vehicles ahead.
These are the situations where good driving hazard perception gives you an advantage.
Hazard perception is not about assuming that something bad is about to happen around every corner. It is about noticing clues early enough to give yourself time and space to respond safely.
For learner drivers, that can initially feel difficult.
You may already be concentrating on steering, pedals, gears, mirrors, road signs and instructions from your driving instructor. Learning to look further ahead and recognise what might change adds another layer.
But hazard perception is not a separate skill that you only need for the theory test.
It is part of everyday driving.
The aim is not to become faster at reacting at the last possible moment.
It is to recognise developing situations earlier so that last-second reactions become less necessary.
What is driving hazard perception?
Hazard perception is your ability to recognise situations that could affect your driving and identify when those situations begin to develop.
There is an important difference between something you should be aware of and a developing hazard.
Imagine a car parked at the side of the road.
While it remains parked and nothing is happening, you should be aware of it, but it may not require you to change what you are doing.
Now imagine its indicator comes on and it begins moving away from the kerb.
The situation has changed.
You may now need to reduce speed, adjust your position or take another appropriate action.
That is the type of change you need to become good at recognising.
Potential hazards are everywhere
Many things around you have the potential to affect your journey.
For example:
- A pedestrian approaching a crossing.
- A cyclist ahead.
- A bus stopped at a bus stop.
- A vehicle waiting at a side road.
- Children near the road.
- Parked vehicles.
- Roadworks.
- A horse and rider.
- A delivery vehicle blocking part of the road.
You do not need to react dramatically to everything you see.
Instead, notice it and ask:
What could change here?
A pedestrian walking along the pavement may require no action.
If they suddenly turn towards the road, the situation changes.
A vehicle waiting at a junction may simply remain there.
If it begins creeping forward, you have new information to consider.
Good hazard perception is about recognising those changes early.
Hazard perception is really about planning ahead
Drivers who recognise hazards early usually have more options.
Suppose you see a cyclist ahead and parked vehicles are narrowing the available road space.
If you recognise the situation early, you can assess the traffic, adjust your speed and decide how to deal with it safely.
If you notice everything at the last second, your choices may be much more limited.
This is why good hazard perception often produces smoother driving.
You have more time to:
- Check mirrors.
- Adjust speed gradually.
- Create additional space.
- Reconsider your position.
- Wait when necessary.
- Make a controlled decision.
The objective is not dramatic reactions.
It is avoiding the need for them where possible.
Why learner drivers sometimes spot hazards late
During early driving lessons, your attention has many competing demands.
You may be thinking about:
- Your steering.
- Clutch control.
- Gears.
- Speed.
- Road position.
- Mirrors.
- The next instruction.
That can cause your vision and attention to become concentrated on the area immediately in front of the car.
You may see the vehicle ahead but miss the brake lights further up the queue.
Or you may see a parked van without considering what it prevents you from seeing.
As basic vehicle control becomes more familiar, you can devote more attention to what is developing around you.
Your instructor can also help you recognise when your observation is becoming too narrow.
Looking is not the same as understanding
You can physically look at something without fully processing what it means.
For example, you may see a bus stopped ahead.
But good hazard perception goes further:
- Are passengers getting off?
- Could somebody cross in front of the bus?
- Is the bus indicating to move away?
- Is it restricting your view?
- Is traffic trying to pass it?
- Is there enough space to continue safely?
The same principle applies to parked vehicles.
Do not just recognise:
"There are parked cars."
Consider what could happen around them.
A door might open.
A pedestrian could appear between them.
One of the vehicles might begin moving.
Oncoming traffic may reduce the available space.
Observation becomes useful when it leads to anticipation.
Look further ahead
One of the most useful habits you can develop is looking beyond the vehicle immediately in front.
The further ahead you recognise a developing situation, the more time you generally have to plan.
For example, several vehicles ahead you may notice:
- Brake lights.
- Traffic slowing.
- A pedestrian crossing.
- A bus pulling out.
- Roadworks.
- A traffic light changing.
- Vehicles changing lanes.
That information may affect you before the vehicle directly ahead begins reacting.
You should still maintain awareness of what is immediately around you.
The aim is to avoid allowing your attention to become fixed on one small part of the road scene.
Build an effective scanning routine
Your attention should move through the driving environment.
Look ahead and gather information about:
- The road layout.
- Traffic.
- Signs.
- Road markings.
- Pedestrians.
- Cyclists.
- Side roads.
- Crossings.
- Parked vehicles.
- Changes in visibility.
Use your mirrors appropriately to understand what is happening behind and around you as well.
This does not mean constantly moving your eyes without purpose.
The checks should help you build an overall picture of what is happening.
Try thinking about the scene in three stages:
What can I see?
What might change?
What would I do if it does?
Over time, this process should become increasingly natural.
Look for clues that something is changing
Hazards often give clues before they fully develop.
A vehicle might:
- Indicate.
- Begin moving.
- Slow unexpectedly.
- Change position.
- Approach a junction quickly.
- Creep forward from a side road.
A pedestrian might:
- Turn towards the road.
- Approach a crossing.
- Move between parked vehicles.
- Appear distracted.
- Begin looking for an opportunity to cross.
You may also notice environmental clues.
For example:
- A ball near the road may suggest children nearby.
- A bus at a stop may mean passengers could cross.
- Brake lights further ahead may indicate slowing traffic.
- A gap between parked vehicles may conceal a pedestrian or side road.
- Mud or debris on the road may suggest changing surface conditions.
You are not trying to predict exactly what everybody will do.
You are recognising possibilities early enough to leave yourself options.
Vulnerable road users deserve particular attention
Some road users may be more vulnerable or may require additional space and consideration.
These can include:
- Pedestrians.
- Children.
- Cyclists.
- Motorcyclists.
- Horse riders.
- Older pedestrians.
- People whose mobility or visibility may be limited.
Children, for example, may behave unpredictably near roads.
If you see children close to the carriageway, recognise that the situation could change quickly.
Similarly, when approaching a cyclist, consider whether parked vehicles, potholes, drains or narrowing road space could cause them to alter their position.
Good hazard perception considers not only where somebody is now, but what may influence their next movement.
Large vehicles can hide hazards
A bus, van or lorry can significantly restrict your view.
If you cannot see around or beyond a large vehicle, do not assume that the hidden area is clear.
There could be:
- A pedestrian crossing.
- A cyclist.
- A junction.
- A stopped vehicle.
- Oncoming traffic.
- Roadworks.
Restricted visibility itself is information.
If you cannot see enough to know what is happening, adjust your driving appropriately rather than relying on an assumption that nothing is there.
Use speed to give yourself more time
Seeing a hazard early is only useful if you leave yourself enough time to respond.
Your speed should be appropriate for what you can see and the conditions around you.
If your view is restricted by:
- A bend.
- The brow of a hill.
- Parked vehicles.
- A large vehicle.
- Poor weather.
- Darkness.
you may need to adjust your speed because you have less information about what lies ahead.
The principle is simple:
The less you can see, the more important it becomes to make sure you have enough time and space to deal with what might appear.
Keep enough space in front
Following distance is part of hazard management.
If you drive too closely behind another vehicle, you reduce both your view and the time available to respond if traffic suddenly slows.
On faster roads, a useful way to judge your following distance is the two-second rule in suitable dry conditions.
Choose a fixed point the vehicle ahead passes, such as a sign or bridge.
There should be at least two seconds before you reach the same point.
The required margin needs to increase when conditions reduce grip or visibility.
Do not treat the two-second rule as permission to follow closely in every situation.
Your distance should always allow you enough time to respond safely to the conditions ahead.
Weather changes the hazard picture
Hazard perception becomes even more important when conditions deteriorate.
Rain can:
- Reduce visibility.
- Reduce tyre grip.
- Increase stopping distance.
- Create standing water.
- Make road markings harder to see.
In wet weather, stopping distances can be at least double those required on dry roads.
Ice and snow can increase stopping distances much more dramatically.
Fog and other poor-visibility conditions reduce how far ahead you can gather useful information.
That means you need to recognise situations earlier and leave larger safety margins.
Do not simply drive exactly as you would on a clear, dry day.
Adapt your speed, following distance and observations to the conditions.
Hazard perception at night
Driving at night changes the information available to you.
You may see headlights before you can clearly see a vehicle.
Pedestrians and cyclists may be more difficult to identify.
Bends and road layouts can also be harder to interpret.
Your speed needs to allow you to stop safely within the distance you can see to be clear.
Look for clues such as:
- Headlights approaching around a bend.
- Reflections.
- Vehicle lights further ahead.
- Pedestrian crossings.
- Road signs.
- Changes in road markings.
Night driving is another reason hazard perception should not rely on memorising particular roads.
Conditions can make a familiar road look and behave very differently.
Do not let other drivers pressure your decisions
You may recognise a developing hazard but feel pressure from a driver behind you.
Perhaps you want to reduce speed because your view is restricted, but another vehicle is following closely.
Do not allow that pressure to make you ignore what you can see ahead.
Continue making decisions based on safety and the road conditions.
Avoid sudden or unnecessary reactions, but do not drive into a situation faster than you believe you can safely manage simply because another road user appears impatient.
Early observation helps here too.
When you recognise a situation early, you are more likely to make gradual, predictable adjustments rather than sudden ones.
Practise hazard perception during driving lessons
Hazard perception should be developed during practical lessons, not just while revising for the theory test.
Your instructor can help you identify the clues you are missing.
For example, they might ask:
"What can you see happening further ahead?"
or:
"What could happen around that parked van?"
or:
"Why might we need more space here?"
These questions encourage you to think beyond the immediate controls of the car.
As your ability improves, you should begin recognising those situations without being prompted.
That reduction in instructor support is an important part of becoming an independent driver.
Commentary driving can help during learning
Some learners find it useful to briefly describe what they are noticing.
For example:
"Bus ahead. Passengers getting off, so somebody may cross."
or:
"Car waiting at the side road. It's starting to creep forward."
or:
"Brake lights ahead. Traffic may be slowing."
You do not need to narrate every object you see.
The purpose is to practise connecting observation with meaning.
Your instructor can help you decide whether commentary is useful for your learning style.
Eventually, much of that thought process should happen naturally without needing to say it aloud.
Review hazards after each lesson
After your lesson, think about one or two situations that required you to change what you were doing.
Ask yourself:
What was the first clue?
When did I notice it?
What did I do?
Could I have recognised it earlier?
This can turn a difficult situation into useful learning.
For example:
"I slowed late because I only noticed the pedestrian when they reached the crossing. Next time I need to identify the crossing earlier and watch the pavement as I approach."
That is much more useful than simply thinking:
"I was bad at hazards today."
You can also use a driving lesson progress tracker to keep track of observation, planning and hazard-awareness skills alongside the rest of your driving.
What is the DVSA hazard perception test?
Hazard perception also forms part of the car theory test.
You watch a series of video clips showing everyday road scenes.
The clips contain developing hazards.
Your task is to identify those hazards as they begin to develop.
The principle is similar to real driving:
recognise the change early.
You are not trying to identify every object that could theoretically become dangerous.
You are looking for the point where something develops in a way that could require you to take action, such as changing speed or direction.
How the hazard perception test works
For the car theory test, you watch 14 video clips.
Each clip contains at least one developing hazard, and one clip contains two.
That means there are 15 developing hazards to identify across the test.
You can score up to 5 points for each developing hazard.
The earlier you correctly recognise a hazard as it begins developing, the more points you can score.
The pass mark for the car hazard perception section is 44 out of 75.
You only get one attempt at each clip, so remain attentive throughout the scene.
When should you click?
Click when you recognise that a hazard is starting to develop.
For example, imagine a vehicle is parked at the side of the road.
Simply being parked does not necessarily make it a developing hazard.
Then its indicator comes on and it begins to move away.
You may now need to change speed or direction.
That is the kind of development you need to recognise.
Do not wait until the situation has become an emergency before responding.
The scoring rewards recognising the developing hazard early.
Do not try to game the hazard perception test
You do not lose points simply because you make a click that does not score.
However, that does not mean you should click constantly.
DVSA states that you will not score for a clip if you click continuously or in a pattern.
Instead of trying to develop a clicking trick, concentrate on reading the road scene.
Ask yourself:
"Is something happening now that could make me change speed or direction?"
If the answer becomes yes, respond.
That approach also reinforces the hazard-perception skills you need when actually driving.
Common hazards to practise recognising
Useful situations to practise include:
- Pedestrians approaching or entering the road.
- Children near parked vehicles.
- Cyclists changing position.
- Vehicles emerging from side roads.
- Vehicles moving away from the kerb.
- Traffic suddenly slowing.
- Buses stopping or moving away.
- Pedestrian crossings.
- Roadworks.
- Restricted views.
- Horses and riders.
- Poor weather.
- Narrow roads.
- Country-road bends.
Do not memorise one response for each situation.
The correct response depends on factors such as:
- Your speed.
- Available space.
- Visibility.
- Road conditions.
- Other traffic.
- What the hazard is actually doing.
Sometimes you may need to brake.
Sometimes easing off the accelerator may be enough.
Sometimes you simply need to recognise the situation and continue monitoring it.
Good hazard perception informs the decision. It does not replace judgement.
Hazard perception continues after you pass the theory test
Passing the hazard perception section does not mean the skill is finished.
It becomes increasingly important as your instructor gives you more responsibility.
During your early lessons, the instructor may identify hazards for you:
"Watch the pedestrian near the crossing."
Later, they may ask:
"What can you see developing ahead?"
Eventually, you should recognise the situation yourself and respond appropriately without being prompted.
That progression is part of becoming an independent driver.
Your practical test is not a repeat of the computer hazard perception test, but observation, planning and appropriate responses to developing situations remain fundamental to safe practical driving.
Make hazard awareness part of every lesson
You do not need to practise hazard perception as a completely separate subject.
It exists throughout your driving.
When practising junctions, look for pedestrians and approaching traffic.
When driving around parked vehicles, think about doors opening, pedestrians appearing and oncoming traffic.
At roundabouts, observe other vehicles, signs, markings and changing gaps.
On faster roads, look further ahead for traffic slowing or conditions changing.
A structured driving tuition plan can help connect these skills rather than treating each driving topic as an isolated exercise.
How Real Drive can support your learning
Hazard perception develops through experience, reflection and good instruction.
Real Drive helps learners keep the practical side of that journey organised.
You can find verified instructors, compare lesson options, manage bookings and maintain better visibility over your learning progress.
If you are still looking for tuition, our guide to choosing a driving instructor explains what to consider before booking.
The technology can help organise the learning journey, but the skill still develops behind the wheel.
Learn to notice change earlier
Good hazard perception is not about driving as though everything around you is dangerous.
It is about gathering useful information early.
Look beyond the vehicle immediately ahead.
Notice where your view is restricted.
Watch for clues from pedestrians, cyclists and vehicles.
Leave enough space to give yourself options.
Adapt to weather, visibility and road conditions.
And when something begins to change, recognise it early enough that your response can remain calm and controlled.
The road will never be completely predictable.
You cannot know exactly what every road user will do.
But you can become better at noticing the signs that something is changing.
That extra time is one of the most valuable things good observation can give you.
Keep learning